

A logical and well thought out editing process is the key to finding your best images and bringing them to life. When I get back into the office I normally download and import the images, add metadata, then take a short break before the editing process begins. I would recommend that you edit your images in a series of steps—unless you are under the gun and have to get a few images out immediately. The reason for this is that we need a logical process, which allows us to spend enough time with the images, to really select the superstar images.
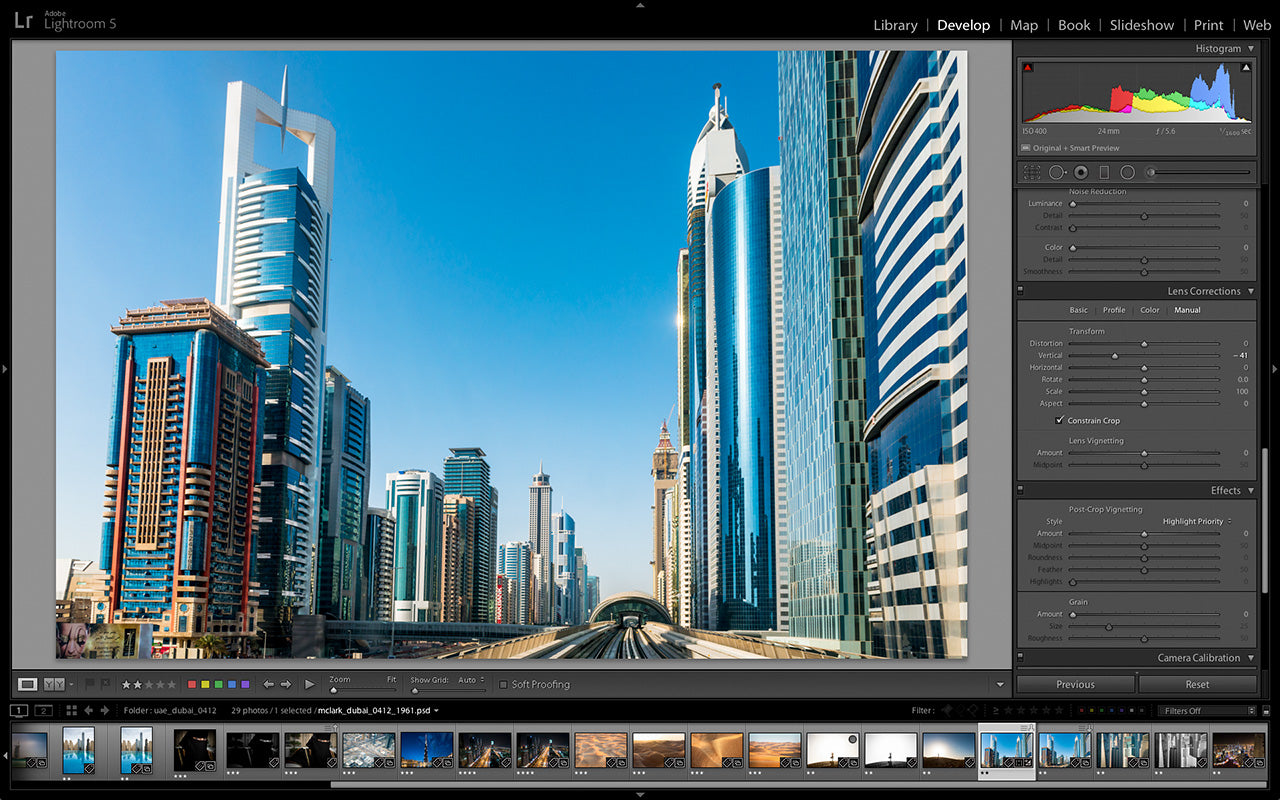
 Above is the Library module of Lightroom with an image shown in the Loupe View mode. I have also selected the "Shift + F" keyboard shortcut twice to force the Lightroom interface into a full screen mode so that Lightroom is as big as possible on my monitor and there is nothing else distracting me.
When I start to edit a shoot I open up Lightroom to the Library module and select the "Shift + F" keyboard shortcut twice to force the Lightroom interface into a full screen mode so that Lightroom is as big as possible on my monitor and there is nothing else distracting me. In Lightroom 5, there is the new "True Full Screen" mode, as shown in Photo 2 below, that displays the selected image full screen on a black background. To enter this mode simply tap the "F" keyboard shortcut or go to Window > Screen Mode > Full Screen Preview. I have to say, this new view mode is one of the best new features in Lightroom 5 and it alone is worth the price of the upgrade. Once I have Lightroom 5 configured, in the "True Full Screen" mode, I put one finger on the right arrow key and another on the number keypad so that I can quickly go through the images one by one and rank them.
 The new "True Full Screen" mode displays the selected image full screen on a black background. To enter this mode simply tap the "F" keyboard shortcut or go to Window > Screen Mode > Full Screen Preview. This new view mode in Lightroom 5 makes editing an extremely quick process and allows us to see our images as large as possible.
My first round of editing is a gut reaction to the images. I’ll give any image I think worthy of consideration a 1-star ranking on the first pass. If I run into images that are out of focus or have technical issues I’ll hit the "X" key and mark them as rejects, which will be deleted at the end of the first round of editing. Once I have gone through the entire shoot, and given the selects a 1-star ranking, I’ll filter for those 1-star images and repeat this process upgrading the deserving images to 2-stars and so on. I use a star ranking system because it affords more flexibility than using the flags or colors. And it lends itself nicely to the editing process I outline here. I will continue this culling process until at least 3 stars or until I feel like I have a group of images I really need to process. In the 2-star round of editing I will start to give three and four star rankings to images that I am sure will be among the final selects. While editing in the second and third rounds, I tend to use the Compare View mode (shown in photo 3 and 4 below), which allows you to look at a pair of images side by side and determine which of your 2 or 3-star images are the real winners. I don’t really have any special meaning for the different ratings I use but in general a 5-star image is rare and these images almost always end up in my portfolio.
 In the screenshot above, I have selected two images in the Library module and then selected the Compare view mode to compare the images side by side. To get into the Compare mode use the keyboard shortcut "C."
I heartily recommend that you take a break between rounds of editing. This will help you keep your sanity and give your eyes a break plus the more time you spend editing the better your edits. Photographers are not necessarily the best editors of their work. We get emotionally attached to images because of the situation, subject or some nostalgic experience we had while capturing an image. Be vicious while editing, look at your images with fresh eyes and judge them for what they are, not by what was happening when you shot the image or how much work it took to create that image.
 In the screenshot above, I have zoomed into two images in the Compare view mode to compare the images side by side. Here I have zoomed into both images so that I can check the sharpness of one image against the other. To zoom into an image simply click on the image in the Compare view mode.
To delete my "rejected" images, I filter for the rejects which is the flag with the "X" in it (the third flag from the left in the filter menu), then select all the images and hit delete, as in Photo 5 below. Lightroom has a series of steps one has to go through to delete images (which is good so you don’t accidentally delete images) so I use the reject flag to mark those images I want to delete. This way I don’t have to go through all the delete protocols with each image.
 In this screenshot I have filtered for my rejects, selected all of them and then hit the Delete key. The Delete dialog comes up and asks if you want to remove them from the Lightroom Library or delete them from your hard drives.
Once I have my images culled to the best of the best, I move onto the processing phase of my workflow which can take some serious time. I have found that images need a lot more attention than most people realize to really dial in the colors so an image will print nicely—especially if it is going to be printed in CMYK by an offset press.
Because I want all of my images to look their best I try to get my selects down to a manageable number of images. For some long trips, where I have shot 3,000 to 10,000 images, it is never going to be a manageable number so I just have to figure I’ll be in front of the computer for a while dealing with those images. It is all just part of the job, but thankfully if I am diligent in the field and have access to electricity I can at least start importing and adding metadata to images on my laptop so that half the battle is over when I get back into the office. And of course I charge a digital processing fee to every client, which helps pay me for this massive amount of time spent in front of the computer.
Also, I want to add a note here on saving your work in Lightroom. Saving your work in Lightroom is simple. You don’t have to! Every time I teach a  workshop on Lightroom one of the questions that comes up again and again is "how do I save my work?" Lightroom saves everything you do in the Lightroom catalog—this is one of the main reasons for the import process. And if you have your preferences set to "Automatically save to XMP" in the Catalog preferences then most everything you do in Lightroom in the Develop and Library modules is saved as an XMP file right next to your raw file. The only items that are not saved into that XMP file are the Develop history settings and any information associated with virtual copies.
This blog post is a modified excerpt from my e-book, Adobe Photoshop Lightroom: A Professional Photographer’s Workflow. For more information on this e-book or to purchase the e-book please visit my website.
KEEP UP WITH MICHAEL: Website | Blog | Workshops | Facebook | Twitter