

Cleaning your camera’s sensor can seem like a daunting task, but in all reality, it is pretty straightforward. Learning how to do it yourself can save you money and time without your camera. I would advise taking extreme care when carrying out these tasks since damaging the sensor can result in expensive repairs, but with that being said, let’s get started.
To start off, you want to do this in a dust-free environment so that you do not further contaminate the camera. You also want to do this with a full battery, so the camera does not die while you are cleaning it.
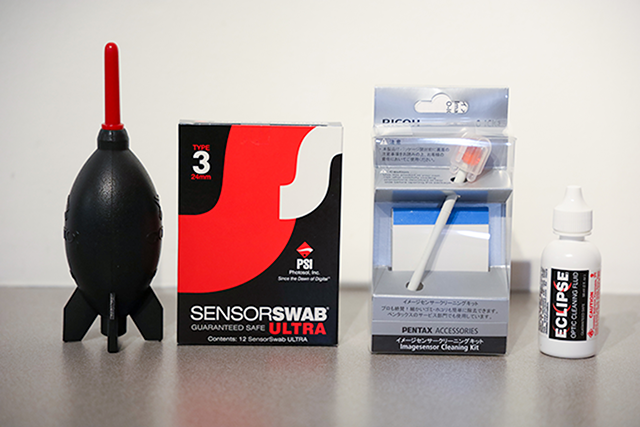
The Tools Needed
Now that we have all our tools and a full battery in the camera, we are going to take the first step which is to take a test shot of what is on the sensor.
Testing for Dust on the Sensor
- Set the camera to a longer exposure, for example, a two-second exposure.
- Use a higher aperture such as f/16 or f/22.
- Take a picture of a white background such as a piece of paper or a white balance card and rotate the camera while taking the photo. Everything in front of the lens is going to get blurred out while everything behind it, on the sensor, is going to show up in the image.
- Check for dust in the photo at 100 percent on the LCD screen. If there is dust, we move on to step two.
Cleaning the Sensor
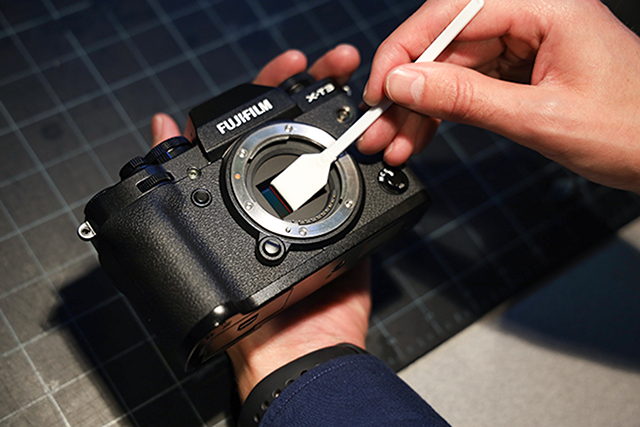
Now that we have taken the test shot, we will move forward with locking up the mirror. To do this, go into the setup menu and go to, “lock mirror up for cleaning” and you are ready to begin. We will start off with the first tool which is the dust blower. While holding the camera upside down, give it a few blasts of air and this will knock loose any of the larger pieces of dust that can get dragged across the sensor resulting in a scratched or damaged sensor.
Once that is done, we will go ahead and pull out a sensor swab and our cleaning solution. You want to use a new sensor swab every time, that way, it is a sterile swab.
After applying a few drops of the cleaning solution, with a small amount of pressure, do one pass on each side of the swab. So do one pass, flip it over and give it one more pass on the other side.
Now that we have used that sensor swab, we are done with it. If we need to use another one, we will pull a fresh one out of the box and open a new package.
Once we have used the swab, we will take another test shot again with the same two-second exposure and high aperture to see if there is any dust remaining.
If there is still dust, instead of having to use a new swab, we are going to use a speck grabber. Start by flipping the mirror up again, grab the speck grabber and we will go in and individually remove each piece of dust.
Once that is done, we will take another test shot. If the camera is clean, we are done. If there are still pieces of dust, repeat the process over again.
Having Your Sensor Professionally Cleaned
Here at the store, we have trained professionals that would be more than happy to clean your camera's sensor. Cleanings cost $34.95 per camera body and we typically have your camera ready in 24-hours or less. Once your cleaning is completed, we will text or call you to let you know it is done.
1 comment
Joseph Rowland
Where do I send my canon t5i camera’s to have them cleaned. Thanks, Joe