How to Make, Not Just Take Pictures
Today, everyone is a photographer.
That isn't sarcasm, it is reality. Rapid advances in technology and the rise of social media make it possible to snap and share every aspect of life, from major milestones to your morning coffee. More than just possible, these photos are desirable and sought after. Close friends, family members, high school acquaintances and even like-minded strangers look for these photos to find connection and camaraderie.
The result is that more people are taking and sharing photos than ever before. However, there is a distinction between those who take pictures and those who make them. Some people point their camera or phone and press a button. Others are intentional about the artistic framing of the image. Even then, that's only half the process. In the day of film photography, editing your photos existed in the darkroom. Today, that process takes place digitally and we even have access to editing software right on our mobile devices.
Before the editing process, if your photos aren't saying all you want them to, try applying a few of these simple artistic and technical tips.
Rule of Thirds
The rule of thirds is simple, easy to remember, and easy to apply to create instantly better photographs.
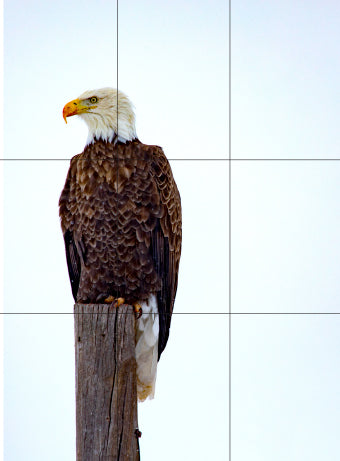
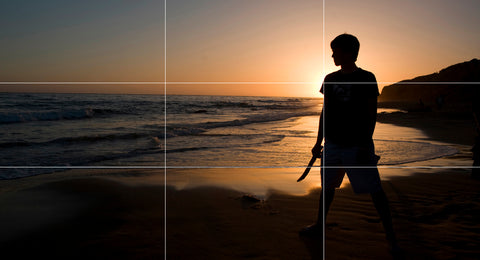
Divide the camera frame into thirds horizontally and vertically. Place the key element of your photo at the intersection of these lines or along the lines. Your viewer gets more context, which makes it a better photograph. Most camera viewfinders and phone camera apps have an overlay you can turn on to see the thirds as you line up your shot.
Understand Horizons and Planes
When your plane is divided by a single, dominant line, where you place that line within the frame is key. You encounter this in landscape photography with actual horizons, but there is a point in every photo where the horizontal meets the vertical.
Choose where to place the horizon using the rule of thirds and these questions: Which part of the photo is the most interesting? How do you want to make people feel by including more or less of that in your image? Create drama and show priority by having your primary subject break the plane.
Angles and Point of View
Shooting the same subject or situation from different angles communicates different things.
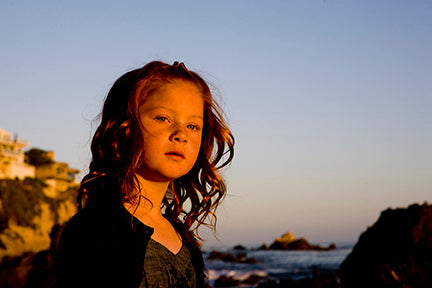
For example, shooting down on a toddler from standing height makes him look smaller. It enlarges features closer to the camera and diminishes those below. This can be an adorable, stylized angle. Maybe it tells a story about how you feel protective of a small, vulnerable child.
If you want to capture the toddler more true-to-life form (and assign him importance in the frame by having him break the horizon) squat down so the lens is at his eye level. This image communicates this child is learning, growing or gaining independence.
Alternately, shooting up on a subject like a mountain or rock star on a stage makes them look taller and more imposing.
Get in Close
A picture of a bouquet you received on your birthday is easy, right? Fit the flowers into the frame and shoot. But moving in closer on a favorite flower, or filling the frame with an interesting subsection of the bouquet, records that memory in a different and perhaps more powerful way.
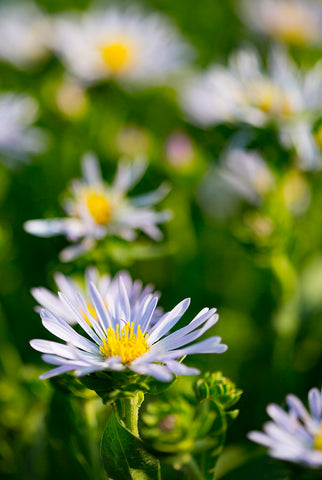
Shooting from multiple angles and distances is a great way to really capture an object, place or event. Take wide shots for ambiance, but move in to capture details. A digital zoom (pinching on your phone screen) is really just "pre-cropping." You end up recording less information, so your photos are more likely to be grainy or blurry. For better photos without pinching, you and your camera should move closer to your subject.
Photography is Light
You can't take a photo without light. The word photo literally means light. It is possible to take photos without much light, but that requires more camera control. Whenever possible use natural light, outdoors or through a window. Natural light is generally the most flattering with a natural color cast. Artificial light is a little harder to deal with because it generally has a warm or cool tone and can be unflattering.

Still, there are times when you take a photo in unnatural or low light because that is the environment of the story. Make sure the most important areas are lit best so you can capture their details. Have people face the light, rather than stand in front of it. If you must have people stand in front of the light source it will be difficult to get detail on their facial features, so consider making the shot more artistic, a profile or silhouette.
Contrast is Key
There is a lot to learn about whites and blacks in photography—but the first thing, and most important, is to have both in every image.
Most entry-level cameras and phones auto-expose your image based on the light in the scene you are shooting. Tapping or focusing on the brightest part of the frame forces the camera to expose for detail in the lighter parts of the image, which may make your shadows too dark to see detail. Tapping on the darkest point forces it to expose for the darks—which may make your whites too bright. The key is to find the point in the middle where you have both black and white and enough detail to make you happy.
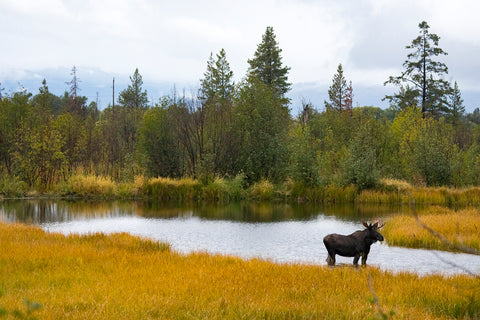
Lots of cameras are taking out the guesswork with an automatic HDR setting (High Dynamic Range). When you shoot HDR your camera actually takes three images almost simultaneously—one over-exposed and bright, one under-exposed and dark and one in the middle. The camera then combines them into one image that has both the highlights and the shadows without losing detail.
The More You Know
Taking better photographs that tell your story more effectively is exciting. Applying these tips will help, but classes are also available for those with single-lens reflex cameras looking to develop more skills. Here at pictureline, we offer a list of local photography classes, some in our own classroom and many others in the area. Our staff members are also happy to answer anyone's artistic and technical questions.

