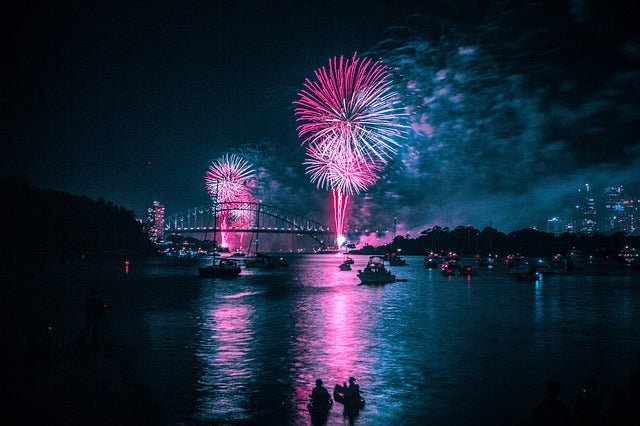
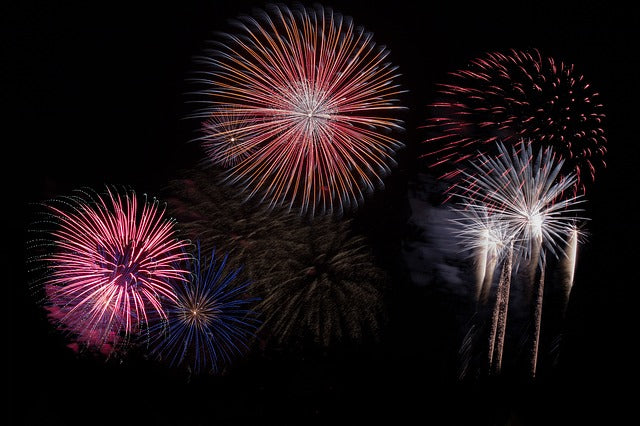
As we begin celebrations honoring our independence and precious freedoms, it is a good time to have your camera ready. Surrounded with family and friends the photo opportunities abound. Speaking of summer holidays, what else says July 4th like fireworks?
How to Photograph Fireworks This Fourth of July
Taking pictures of fireworks can be tricky at times. To help you get the best results, we go over everything you will need to know about how to photograph fireworks.
Bringing the Right Equipment
For best results in photographing fireworks, a camera with a timer and an adjustable lens, is a good thing. Since most exposures are going to be long, a tripod is also needed. It is best to position the camera away from extraneous ground lights, to better view the aerial displays. A cable release or other remote camera-triggering device is also advisable to keep from getting blurry results. Since most cameras sustain a constant drain on the battery during time exposures, it is best to have extra batteries on hand.
Finding the Right Location
If possible, try to arrive at your location early and scout out a camera position with a good dark sky behind the fireworks bursts for the deepest color saturation. Make sure to situate yourself so that the camera has a clear view above most obstacles, such as trees, buildings and heads for this project. It does, however, add atmosphere and realism in a picture to have some of the above items silhouetted at the edges of the image. A zoom lens can be very helpful in obtaining a field of view that about matches the expanse of the sky being filled by the exploding and cascading fireworks.

Setting Up Your Camera
To begin, securely attach the camera to the tripod and keep the camera neck strap loosely wrapped about your wrist to avoid knocking over the camera in the dark. Focus at infinity, or place your camera in the landscape exposure mode to ensure the greatest depth of field. Choose the RAW setting on your camera, or High-Quality .jpeg if RAW is unavailable, for the least amount of compression in your images.
Over-compression is a particular problem for this subject matter because compression artifacts are typically found in areas of high tonal and color contrast, like the bright-colored light of fireworks bursting against an inky black sky. Less compression means fewer image artifacts and ultimately better image quality.
If you are not very careful about exposure, you can overexpose and lose detail in the highlights. Since fireworks are the highlights, capturing them can be tricky. You will need to be able to control how long the shutter is open. For fireworks, I make exposures anywhere between 1 and 4 seconds. Shorter exposures don’t always capture the full burst and longer exposures tend to produce washed-out results.
If you have a B (Bulb) shutter speed setting you can use it to control exactly how long your shutter is open. That is my preferred method. The trick is to open the shutter right at the beginning of the burst and close it when it reaches its peak. Anticipating the explosion can be fun, and not at all impossible. If you don’t have a B setting you can choose a fixed setting, such as 1 second. Then use one of the suggested apertures listed below. For a quality check, use your preview for a test and then compensate using the aperture accordingly. Since the shutter speed must be long enough to record the explosion of the shell, I find it best to control the exposure quality by choosing the correct aperture size.
ISO Setting Lens Aperture 50 f/ 5.6 ~ 8.0 100 f/ 8.0 ~ 11.0 200 f/ 11.0 ~ 16.0 400 f/ 16.0 ~ 22.0
There are lots of alternatives available while shooting fireworks displays. To capture multiple fireworks bursts, open the shutter and continue to hold it open for a two or three burst set. The lens may be temporarily covered with a card or a black-gloved hand between the bursts. To add some zest and variety, zoom the lens from its widest to the longest position during a burst.
During a presentation of many fireworks, a great deal of smoke builds up, especially near the ground. This will cause an overexposure condition. Be prepared to decrease your exposure (stop down) in mid-stream, if necessary.
Eliminating Noise
Long exposures, higher ISO settings, and even higher temperatures can introduce digital noise into your photographs. Noise is typically visible in very dark or black areas of the image, which is evidenced by colored pixel artifacts. Although you can’t avoid long exposures when shooting fireworks, you can choose a lower ISO setting. Increasing the ISO on your digital camera is like turning up the volume on your radio. By amplifying the signal suddenly every pop and crackle can be heard. That’s why the best recommendation is to stay at the 100 ISO setting.

One method to reduce noise in a digital image is to make a black frame during the shoot and then sandwich it with the noisy shot in Photoshop later. To make a black frame, place the lens cap over the lens and make an exposure using the same settings that you used during your shoot. I usually try to make one of these exposures before I start shooting, and then another one at the end of the shoot. That way I won’t forget.
Later In Photoshop:
1. Open the black frame file alongside an image that has noise.
2. Shift + Drag the black frame Background layer over the noisy image workspace to create a new layer. (Holding the Shift key ensures that the new layer maintains perfect registration.)
3. Change the Layer Mode of the black frame layer from Normal to Difference at the top left of the layers pallet. The opacity of the layer may also be reduced as needed. The noise in the image should be reduced significantly utilizing this technique.
Take lots of shots to improve the odds of getting a great picture. Photographing fireworks is a lot of hit and miss and there is not enough time to review and erase digital images between bursts. Before the ‘Grand Finale’, insert a new roll of film or a clean memory card. There are few things worse than your adventure ending before the pyrotechnics end.


